 Save
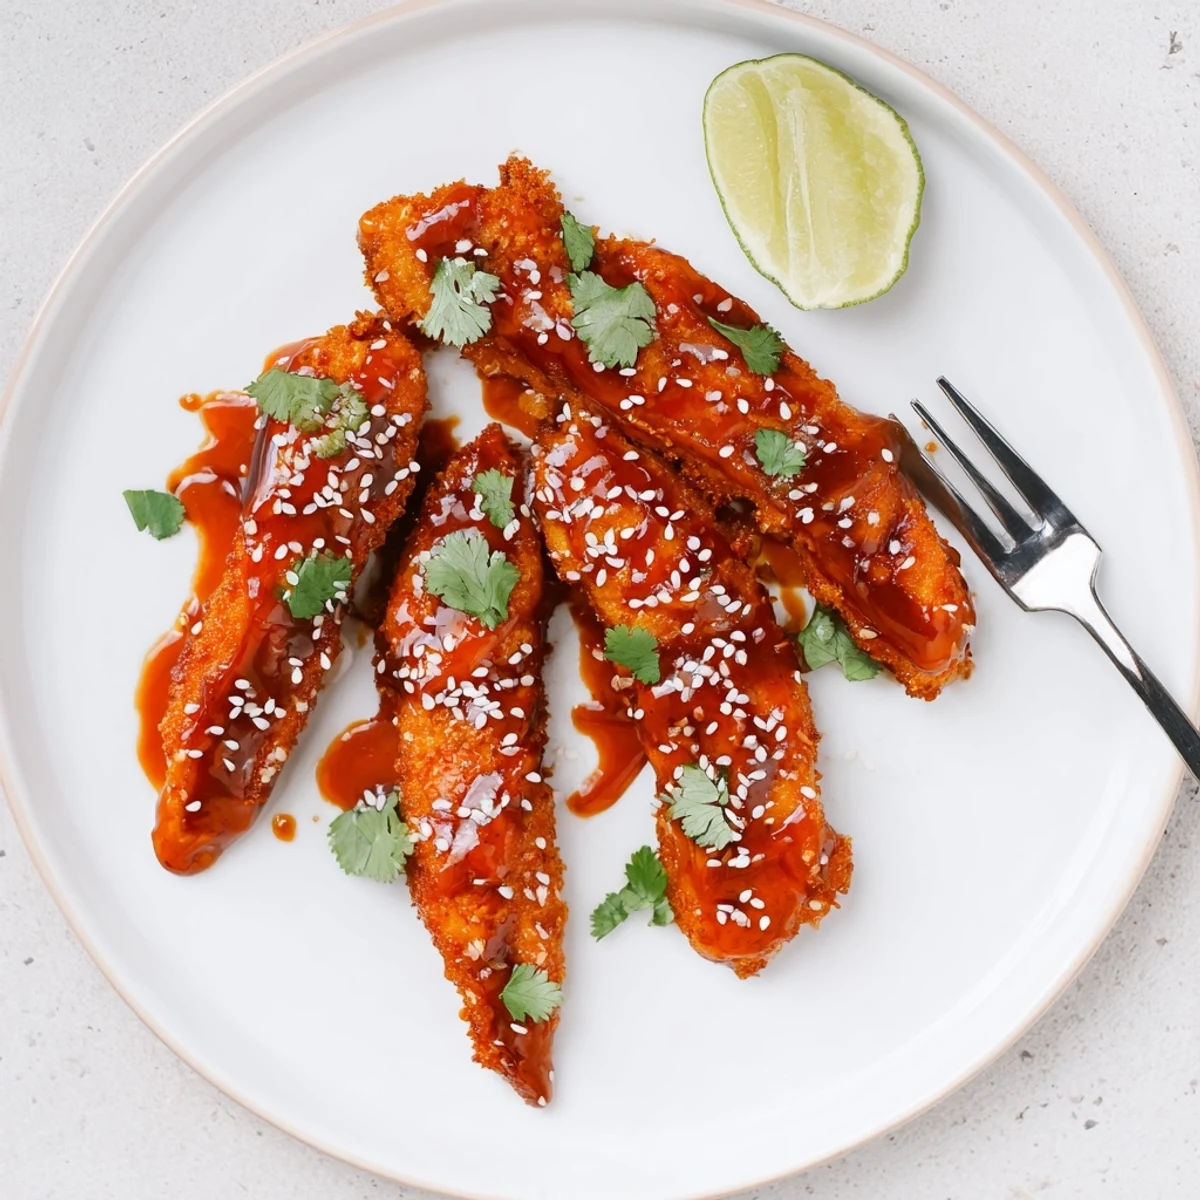
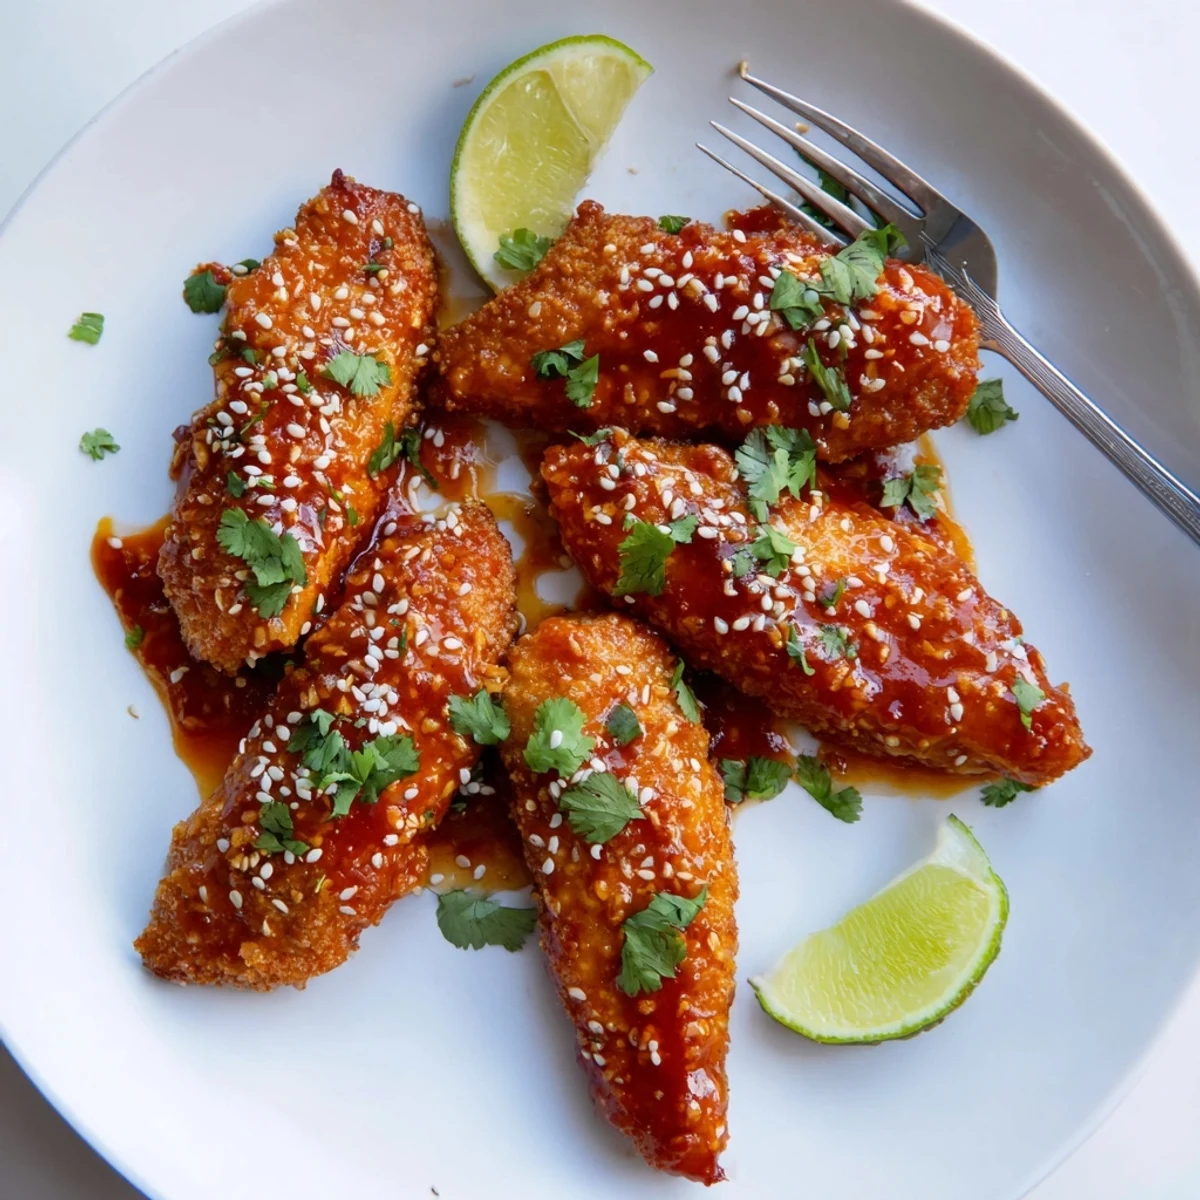
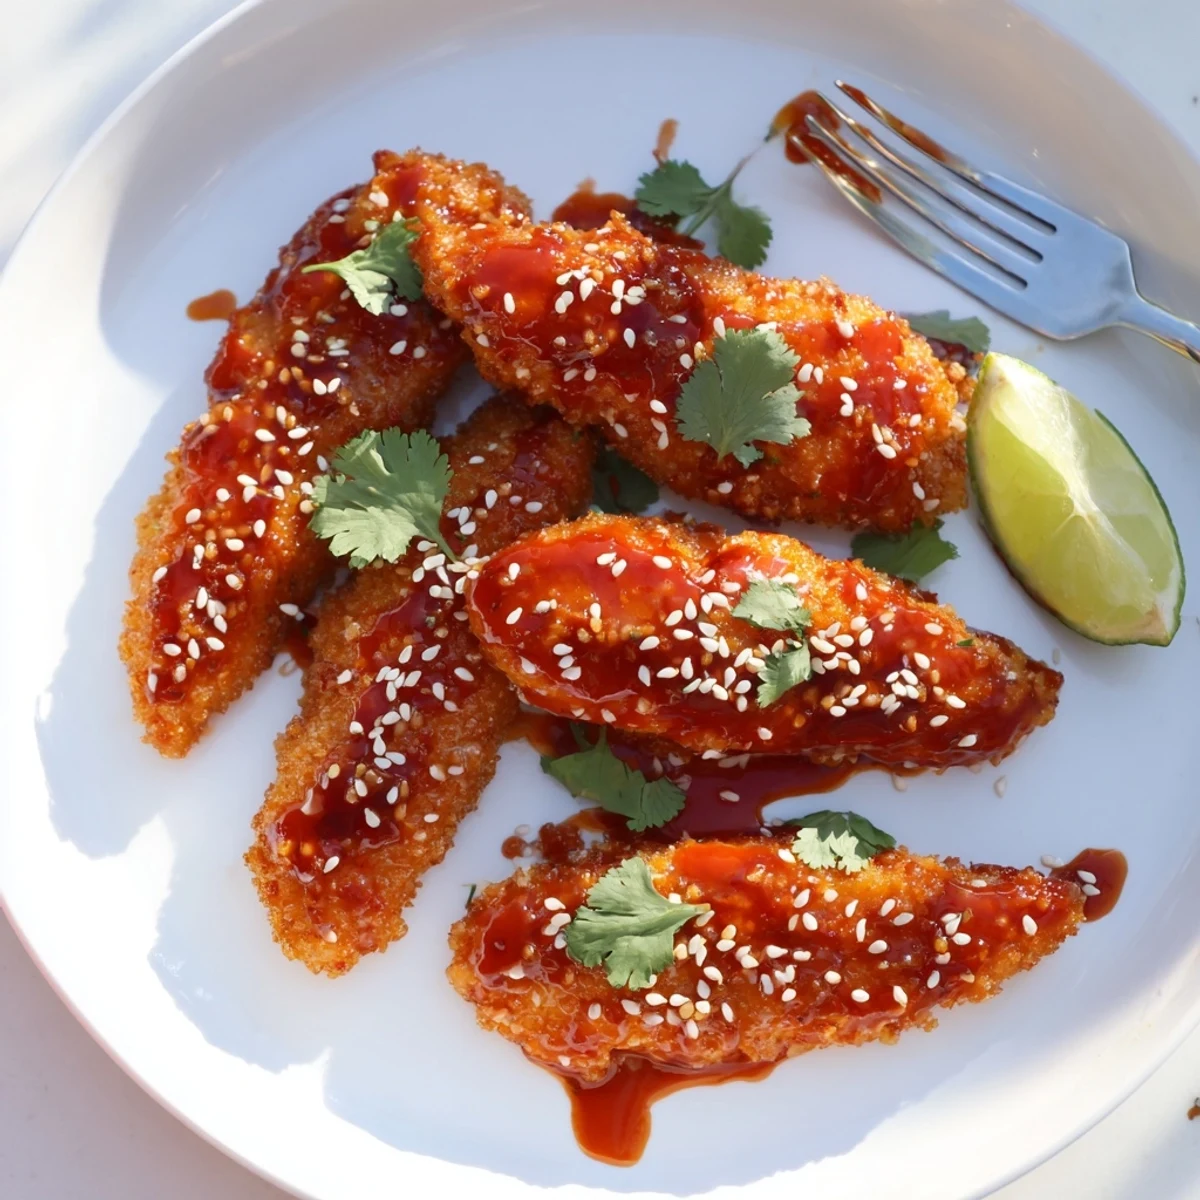
Save These Thai sticky chicken fingers feature tender, marinated chicken strips coated in crispy panko breadcrumbs, then tossed in a luscious sweet chili and soy glaze. The marinade of soy sauce, lime juice, fish sauce, garlic, and ginger infuses each piece with bold Southeast Asian flavors.
They can be baked or fried to golden perfection, then finished with a sticky sauce made from sweet chili, honey, soy sauce, and a kick of sriracha. Garnished with sesame seeds and fresh cilantro, they're ideal for feeding a crowd or spicing up weeknight dinners.
The sizzle of chicken hitting a hot pan on a rainy Tuesday evening is what kicked off my obsession with these Thai sticky fingers. I had half a bottle of sweet chili sauce languishing in the fridge door and a pack of chicken tenders that needed using. What started as a lazy dinner turned into the most requested dish in my house, and now friends text me asking when Im making the sticky chicken again.
I brought a platter of these to a potluck once and watched three grown adults hover near the table pretending to chat while secretly refilling their plates. My neighbor Linda asked for the recipe twice because she lost it the first time, and I suspect she may have lost it on purpose just to ask again.
Ingredients
- Chicken: 600 g boneless skinless chicken tenders or breast cut into strips, which give you that tender bite without any fussing with bones.
- Soy sauce: 2 tbsp for marinade plus 2 tbsp for sauce, the backbone of that savory umami depth throughout.
- Lime juice: 1 tbsp to brighten the marinade and wake up the flavors before cooking.
- Fish sauce: 1 tbsp, and dont be put off by the smell straight from the bottle because it melts into something magical.
- Garlic: 1 clove finely minced, just enough to give a quiet hum of flavor without taking over.
- Ginger: 1 tsp freshly grated, which adds a warmth that ties everything to that Thai inspiration.
- Flour: 100 g all purpose flour for the first coat, creating the base layer that helps everything else stick.
- Eggs: 2 large eggs beaten, acting as the glue between flour and breadcrumbs.
- Panko breadcrumbs: 120 g for that shatteringly crisp exterior that holds up under the sticky sauce.
- Salt and pepper: Half a teaspoon each mixed into the panko for seasoning from the outside in.
- Sweet chili sauce: 60 ml, the star of the glaze that brings fruity heat and glossy shine.
- Honey: 2 tbsp to deepen the sweetness and help the sauce cling to every ridge of the chicken.
- Rice vinegar: 1 tbsp for a sharp little kick of acidity that balances the richness.
- Sriracha: 1 tbsp optional, but I always add it because the gentle burn keeps people reaching for more.
- Sesame oil: Half a teaspoon for a nutty aroma that makes the whole kitchen smell like a Thai street stall.
- Garnish: 1 tbsp sesame seeds, 2 tbsp chopped cilantro, and lime wedges to finish it off with color and freshness.
Instructions
- Marinate the chicken:
- Whisk together the soy sauce, lime juice, fish sauce, minced garlic, and grated ginger in a bowl, then toss in the chicken strips until every piece is slick with the mixture. Cover and let it sit for at least 15 minutes while you set up everything else.
- Set up the coating station:
- Arrange three shallow bowls in a row, one with flour, one with beaten eggs, and one with panko mixed with salt and pepper. This assembly line saves you from sticky fingers crossing back and forth.
- Preheat your cooking surface:
- Heat your oven to 200 degrees C and line a baking sheet with parchment, or heat about a centimeter of oil in a wide pan if you prefer frying. The oven route is easier for a crowd, while pan frying gives you a slightly crunchier crust.
- Coat each piece:
- Shake off excess marinade from a chicken strip, then dredge it in flour, dip it in egg, and press it firmly into the panko until completely coated. Really press the breadcrumbs on with your palms because that pressure is what keeps the coating attached during cooking.
- Cook the chicken:
- Arrange coated pieces on the baking sheet and bake for 18 to 22 minutes, flipping halfway through, or fry in hot oil for about 3 to 4 minutes per side until deeply golden. You want the crust to look almost too brown because it softens slightly under the sauce.
- Make the sticky sauce:
- While the chicken cooks, combine sweet chili sauce, honey, soy sauce, rice vinegar, sriracha, and sesame oil in a small saucepan over medium heat. Stir for 3 to 5 minutes until it bubbles and thickens enough to coat the back of a spoon.
- Toss and glaze:
- Transfer the cooked chicken fingers into a large bowl and pour the warm sauce over them, then toss gently with tongs until every piece is glossy and coated. Work quickly here because the sauce sets up as it cools and you want an even coat.
- Serve and garnish:
- Pile the saucy chicken onto a platter, scatter with sesame seeds and chopped cilantro, and tuck lime wedges around the edges. Serve immediately while the crust is still holding its crunch.
 Save
Save The best batch I ever made was the one where I accidentally doubled the sriracha and watched my brother in law sweat through his shirt while insisting it was perfect. He ate fourteen pieces and then sat in the backyard pretending he was fine.
What to Serve Alongside
A mound of jasmine rice soaks up the extra sauce beautifully, and a quick cucumber salad with rice vinegar and a pinch of sugar cuts through the richness. I have also been known to eat these standing over the sink with nothing else, which is honestly a perfectly valid serving suggestion.
Making It Your Own
You can swap the chicken for firm tofu pressed dry and cut into slabs, following the exact same coating and sauce method. The glaze also works brilliantly on grilled shrimp or even roasted cauliflower florets if you want to stray from the original but keep the spirit.
Storage and Reheating
Leftovers keep in the fridge for about three days, though the crust softens overnight into something more like a sticky teriyaki situation that is still wildly delicious. To bring back some crunch, reheat them on a wire rack set over a baking sheet in a hot oven for about eight minutes.
- Store the sauce separately if you can, because naked chicken fingers reheat better than sauced ones.
- A quick flash under the broiler also works if you are in a hurry and do not mind watching them like a hawk.
- Never microwave them unless soggy is the texture you are going for, in which case live your truth.
 Save
Save Once you have this sauce in your life, you will find yourself drizzling it on everything from roasted broccoli to scrambled eggs at 2 in the morning. Make extra, trust me on that one.
Recipe FAQs
- → Can I bake these chicken fingers instead of frying?
-
Yes, bake them at 200°C (400°F) for 18 to 22 minutes, flipping halfway through, until golden and cooked through. Baking yields a slightly lighter result while still delivering great crunch from the panko coating.
- → How do I get the crispiest coating on the chicken?
-
For maximum crispiness, try double-coating by repeating the egg and panko steps. Also, make sure to press the panko firmly onto each strip. If baking, lightly spray the coated chicken with oil before putting it in the oven.
- → Can I make the Thai sticky sauce ahead of time?
-
Absolutely. The sauce can be prepared a day in advance and stored in an airtight container in the refrigerator. Gently reheat it in a saucepan over low heat before tossing with the cooked chicken fingers.
- → What should I serve with Thai sticky chicken fingers?
-
They pair wonderfully with steamed jasmine rice, a refreshing cucumber salad, or stir-fried vegetables. For a party spread, serve them as an appetizer with extra sweet chili sauce on the side for dipping.
- → Can I use chicken breast instead of tenders?
-
Yes, simply cut boneless, skinless chicken breasts into even strips about 1 inch wide. Keeping the pieces uniform ensures they all cook at the same rate and absorb the marinade evenly.
- → How spicy are these chicken fingers?
-
The base sauce is sweet and mild thanks to the sweet chili sauce and honey. The sriracha is optional, so you can adjust the heat level to your preference. Start with one tablespoon and add more if you like extra spice.