 Save
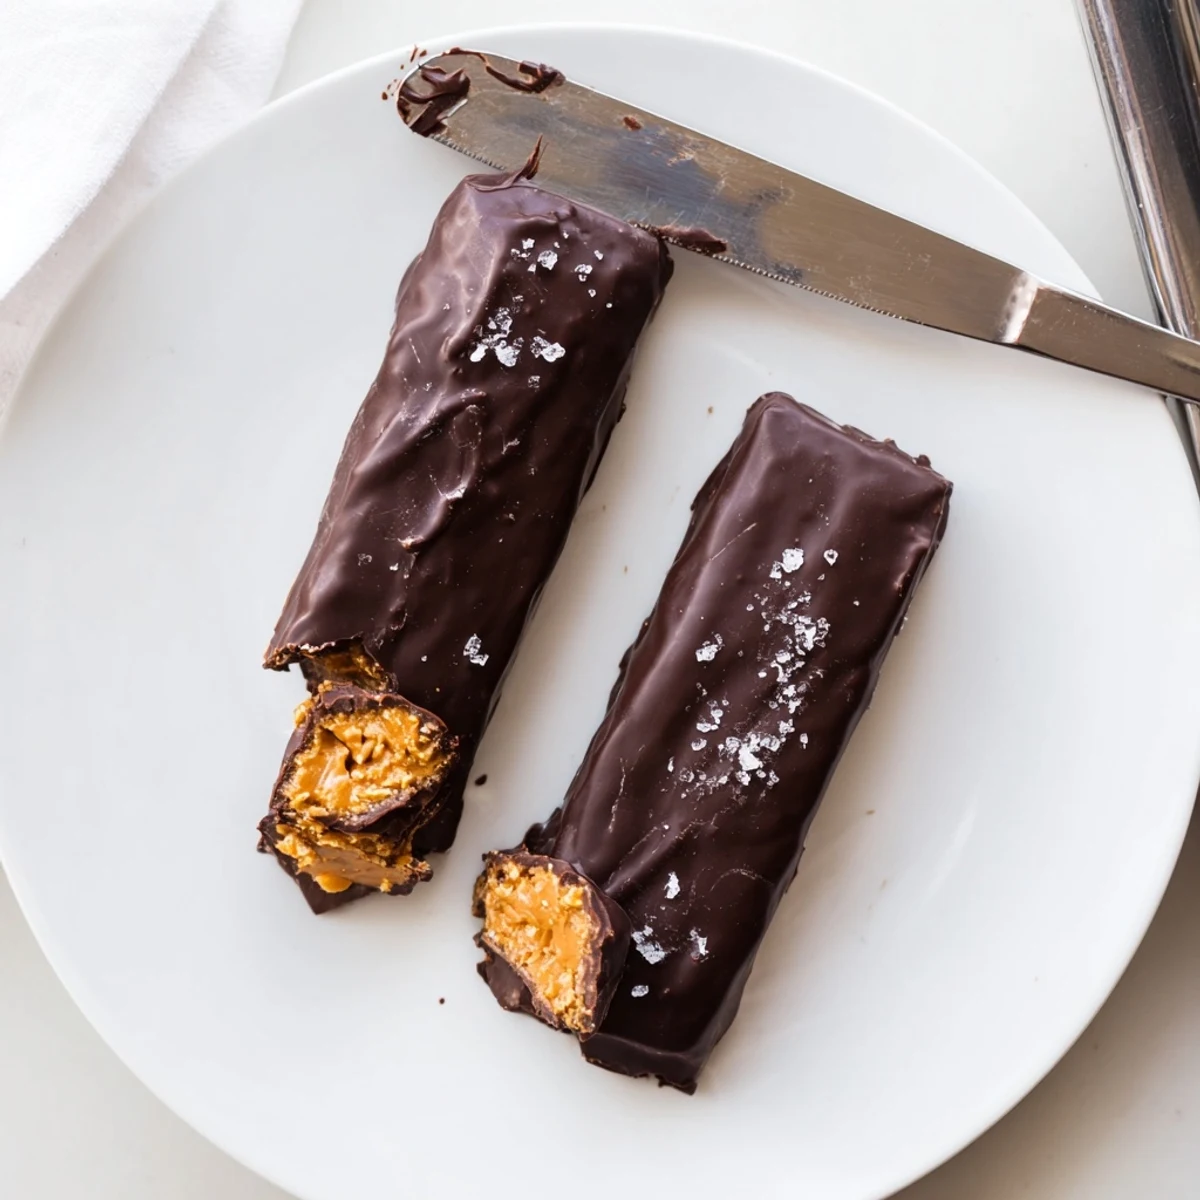
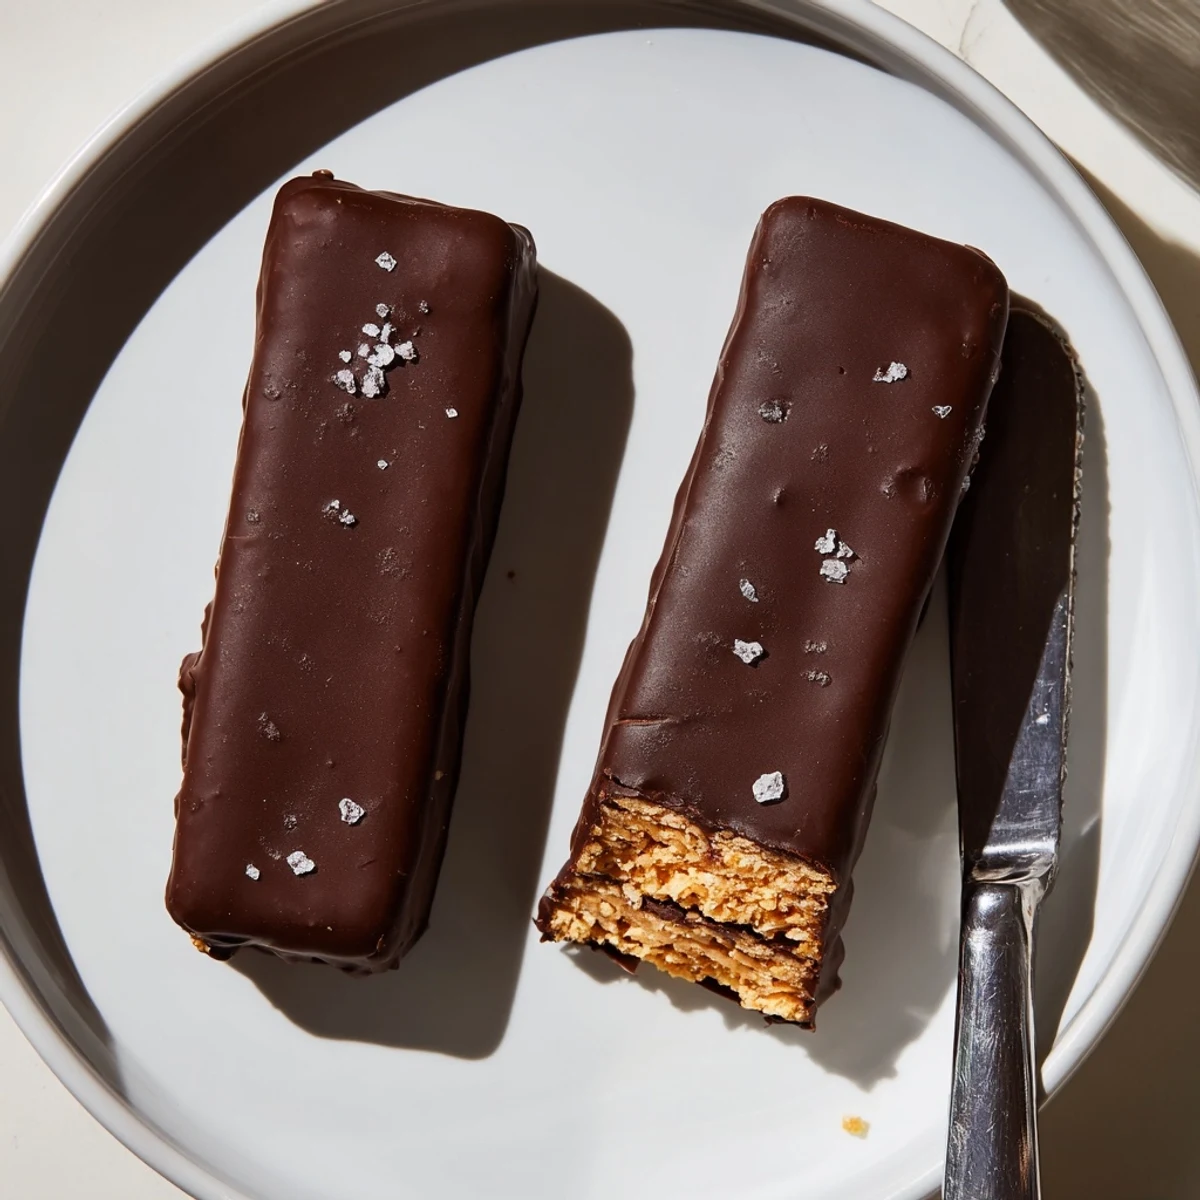
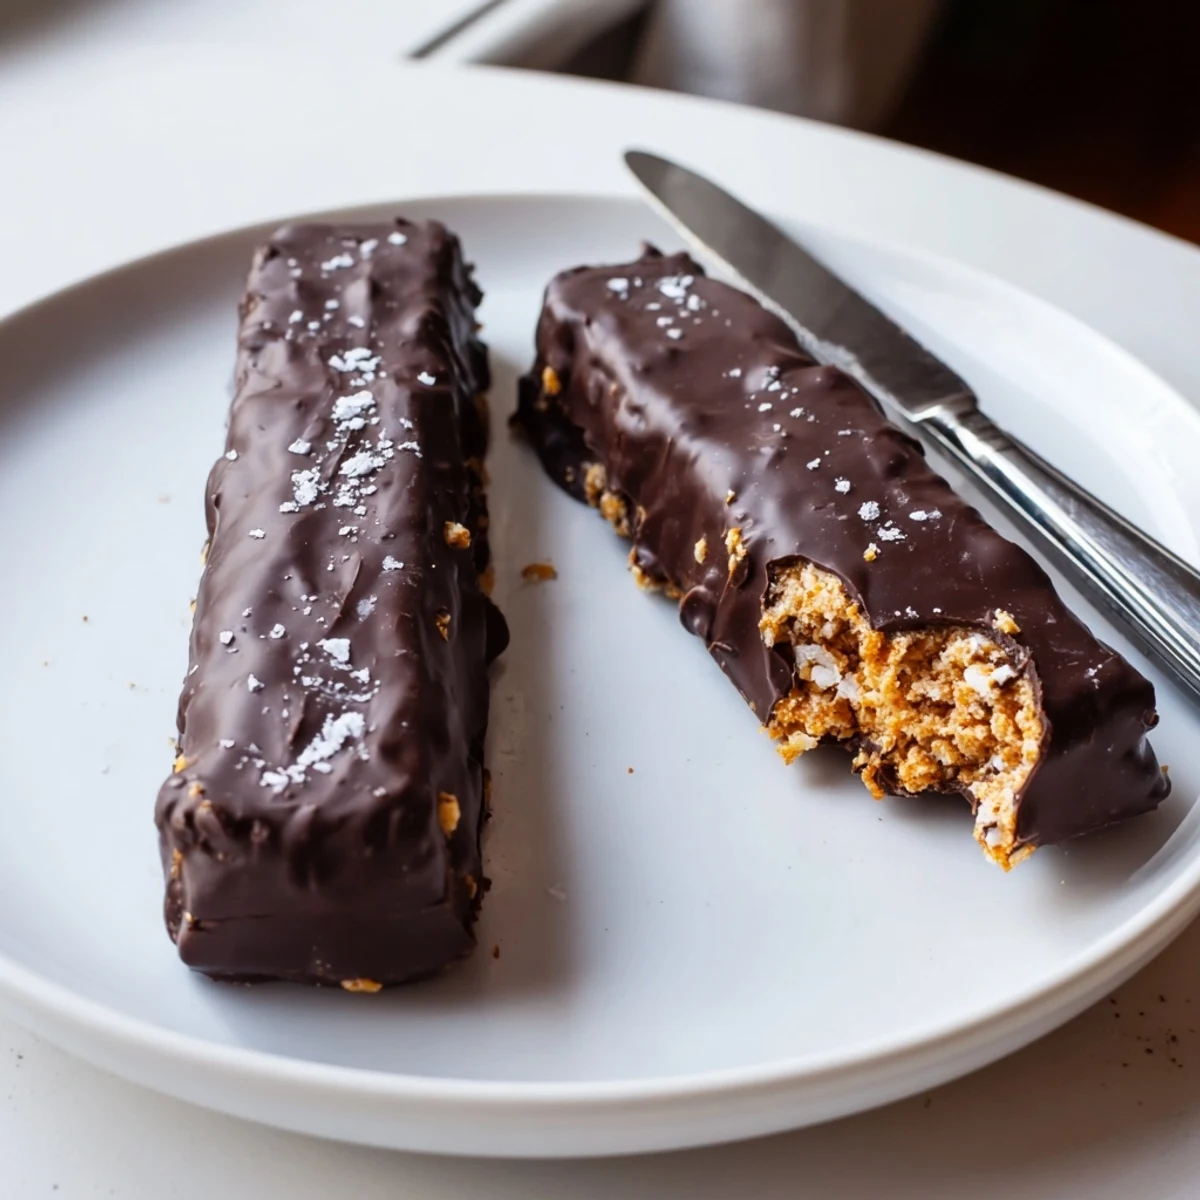
Save These healthy homemade Butterfingers capture everything you love about the classic candy bar with a wholesome twist. A crunchy peanut butter and cornflake filling provides that signature snap, while a dark chocolate coating adds rich indulgence.
Ready in about an hour with just 20 minutes of active preparation, these no-bake bars are vegetarian and easily made gluten-free and vegan. They use simple pantry ingredients like natural peanut butter, pure maple syrup, and cornflakes.
Each bar delivers 160 calories with only 8 grams of fat, making them a smarter alternative to store-bought candy. Store them in the fridge for up to a week or freeze for up to three months.
The candy aisle at the grocery store always gets me, especially those bright orange Butterfinger packages staring back from the shelf. One rainy Tuesday evening, instead of grabbing my usual checkout impulse treat, I drove home and rummaged through my pantry with a mission. Peanut butter, cornflakes, dark chocolate, and twenty minutes later, my kitchen smelled like a candy factory and I was hooked for life.
I brought a batch of these to my neighbors holiday potluck last December, fully expecting them to sit politely next to the fudge and cookie platters. Within an hour the plate was empty and three people cornered me by the punch bowl demanding the recipe. My neighbor Dave, who claims he does not have a sweet tooth, quietly ate four of them while pretending to help clean up.
Ingredients
- Natural creamy peanut butter (1 cup): Use the kind with just peanuts and salt on the label because the separated oils actually help bind everything together beautifully.
- Pure maple syrup or honey (1/2 cup): Maple syrup keeps it vegan, but either one adds the gentle sweetness that balances the salt perfectly.
- Vanilla extract (1 teaspoon): A small amount goes a long way in rounding out the flavors and making it taste like real candy.
- Cornflakes (2 cups, lightly crushed): Crush them by hand in a zip bag for the best texture, and use certified gluten-free if that matters to you.
- Sea salt (a pinch): This tiny addition makes the peanut butter layer taste deeper and more complex.
- Dark chocolate chips (1 1/2 cups): Good quality chips melt smoother and the slight bitterness contrasts the sweet filling perfectly.
- Coconut oil (1 tablespoon): This is the secret to that glossy, snappy chocolate coating that snaps when you bite into it.
Instructions
- Prep your pan:
- Line an 8x8 inch baking dish with parchment paper, leaving some hanging over the edges so you can lift the whole block out later without any struggle.
- Melt the base:
- In a saucepan over medium low heat, stir the peanut butter and maple syrup together until smooth and warmed through, about two to three minutes. Take it off the heat and stir in the vanilla and salt until everything smells incredible.
- Add the crunch:
- Gently fold in the crushed cornflakes, stirring until every flake is coated in that golden peanut butter mixture and no dry spots remain.
- Press and freeze:
- Spread the mixture evenly into your prepared pan, pressing it flat and firm with a spatula so the bars hold together. Pop it in the freezer for twenty to thirty minutes until it feels solid and set.
- Cut into bars:
- Lift the whole slab out using the parchment overhang and place it on a cutting board. Use a sharp knife to cut sixteen even bars, wiping the blade between cuts for clean edges.
- Melt the chocolate:
- Combine the chocolate chips and coconut oil in a microwave safe bowl, heating in thirty second bursts and stirring between each until silky smooth with no lumps.
- Coat each bar:
- Dip each peanut butter bar into the melted chocolate, using a fork to flip it and tap off the excess so you get a thin even layer on all sides. Place each coated bar on a fresh parchment lined tray.
- Chill and set:
- Slide the tray into the fridge for fifteen to twenty minutes until the chocolate shell is firm and glossy to the touch.
 Save
Save There is something deeply satisfying about making your own candy bars from scratch, hearing that chocolate shell crack when you take the first bite. It transforms a simple afternoon into a tiny celebration.
Keeping Them Fresh
These bars stay their best stored in an airtight container in the refrigerator for up to two weeks, though honestly they rarely last that long in my house. You can also freeze them layered between sheets of parchment for up to three months, which means you can always have a homemade candy stash ready for unexpected guests or late night cravings.
Making It Your Own
Sometimes I sprinkle flaky sea salt over the wet chocolate coating for a sweet and salty situation that rivals any artisan candy bar. Swapping milk chocolate for dark is perfectly fine if you prefer something sweeter, and a dash of espresso powder in the peanut butter mixture adds a warmth that people cannot quite identify but always love.
What to Watch Out For
The biggest trap is overcrushing the cornflakes into dust, which leaves you with dense bars instead of that signature flaky crunch. Underfreezing is another common misstep that leads to bars falling apart during dipping, so be patient and let that freezer do its job.
- Check all labels if cooking for someone with allergies because chocolate chips and cornflakes can hide surprising ingredients.
- Let the bars sit at room temperature for about five minutes before eating for the best texture and flavor.
- Double the batch because trust me, one pan will not be enough.
 Save
Save Homemade candy bars are one of those small kitchen joys that make you feel like you cracked a secret code. Share them generously and watch people light up.
Recipe FAQs
- → Can I make these Butterfinger bars vegan?
-
Yes, simply use maple syrup instead of honey and choose dairy-free dark chocolate chips. Coconut oil remains the same. Check that your cornflakes are also vegan-friendly, as some brands contain animal-derived vitamin D3.
- → Why are my bars falling apart when cutting?
-
The mixture needs adequate freezing time to set properly. Ensure the pan chills for at least 20–30 minutes until completely firm. Using a sharp knife and cutting in one confident motion also helps achieve clean edges.
- → What can I substitute for cornflakes?
-
Rice cereal like Rice Krispies works well as a gluten-free alternative. Crushed pretzels or graham crackers can also provide crunch, though they will alter the flavor and dietary profile of the bars.
- → How should I store the finished bars?
-
Keep bars in an airtight container in the refrigerator for up to one week. For longer storage, freeze them between layers of parchment paper for up to three months. Let frozen bars thaw in the fridge for about 10 minutes before enjoying.
- → Can I use milk chocolate instead of dark chocolate?
-
Absolutely. Milk chocolate will give a sweeter, creamier coating closer to the original Butterfinger. You may want to reduce the coconut oil slightly since milk chocolate tends to be softer when melted.
- → Do I need to crush the cornflakes before mixing?
-
Lightly crushing the cornflakes is recommended for the best texture. Place them in a zip-top bag and gently press with your hands or a rolling pin. Avoid over-crushing into powder, as some larger pieces create the signature Butterfinger crunch.