 Save
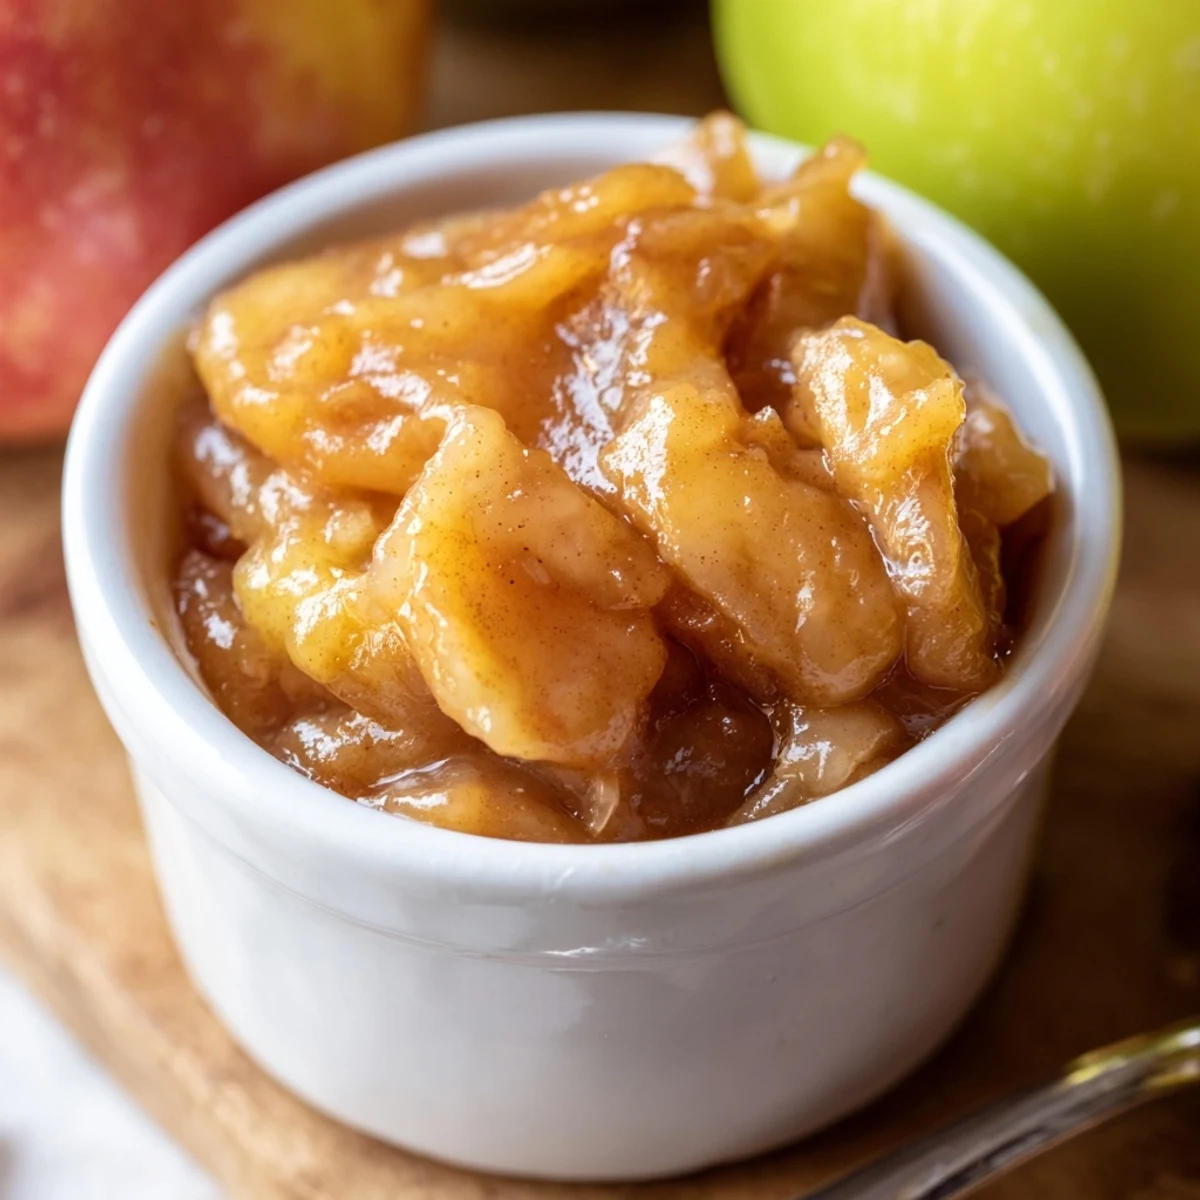
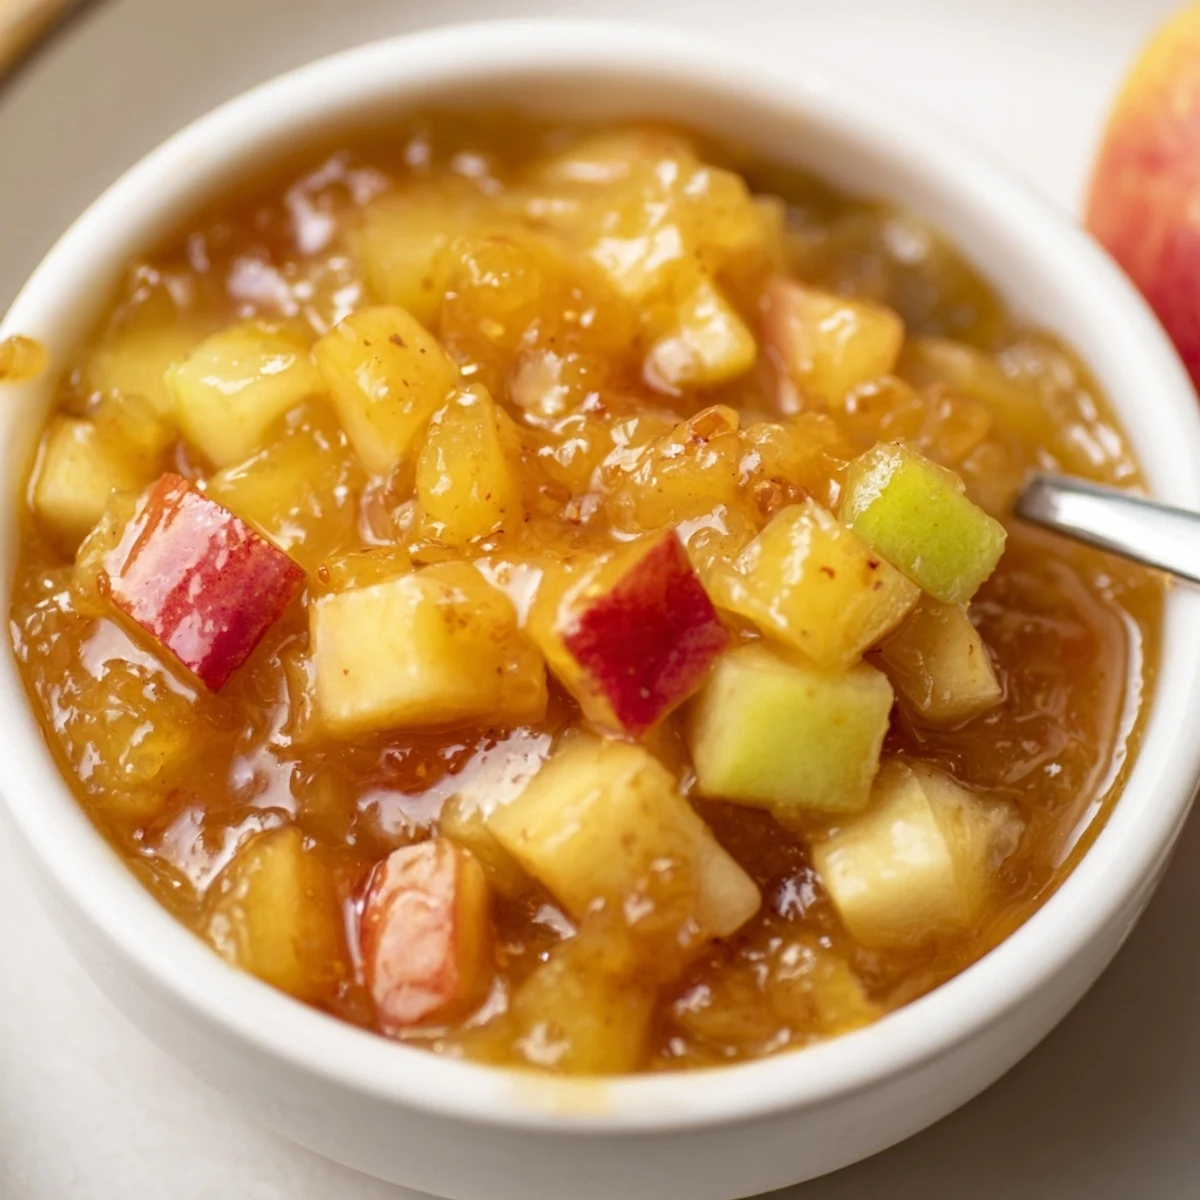
Save This autumn caramel apple jam blends peeled, tender apples simmered with lemon and cider, then caramelized with granulated and brown sugars and butter until glossy and amber. Ground cinnamon, nutmeg and allspice deepen the profile while pectin gives a reliable set after a brief hard boil. Jar hot into sterilized half-pints and process in a ten-minute water bath for safe long-term storage; cool completely before labeling and gifting.
The first time the sweet, spiced aroma of bubbling caramel apple jam filled my kitchen, it was a rainy afternoon with windows fogged from the steam. There’s something quietly satisfying about standing over a pot, wooden spoon in hand, as apples break down and caramel laces itself through their tartness. Making jam always feels more like an alchemy than a recipe. The transformation is as much about the cozy mood as the finished jars lining the counter.
Last October, my neighbor wandered in, drawn by the scent, and together we impatiently spooned warm jam onto the heels of leftover bread, giggling as molten caramel threatened to drip down our wrists. That accidental, sticky taste-test made me realize this jam isn’t just for gifting—sometimes, you owe yourself the best jar. Now, every batch comes with a secret taste for the cook and a nod to spontaneous company.
Ingredients
- Apples (6 cups, Honeycrisp or Granny Smith): These apples balance tartness and sweetness; choose fresh ones for the brightest flavor, and cut them finely for even cooking and a lush, thick texture.
- Lemon Juice (1/4 cup): Freshly squeezed is vital: it keeps the apples’ color bright and helps the jam set perfectly.
- Granulated Sugar (2 cups): Don’t skimp; this is the secret to a true preserve—and dissolving it fully prevents graininess.
- Light Brown Sugar (1 cup, packed): Adds a subtle depth; press it into the measuring cup for accuracy and richer caramel notes.
- Unsalted Butter (1/2 cup, cubed): The butter is what gives the jam its creamy, caramelized finish; melt it in gently to avoid greasy patches.
- Ground Cinnamon (2 teaspoons): Don’t be shy—this is how it smells like autumn on the stove.
- Ground Nutmeg (1/2 teaspoon): Grind it fresh if possible for an extra boost of warmth.
- Ground Allspice (1/4 teaspoon): Just a touch ensures the jam doesn’t veer into apple pie territory—it stands on its own.
- Salt (1/2 teaspoon): A small but mighty addition that sharpens the caramel and apple flavors.
- Liquid Pectin (1 pouch, 3 oz): Skip the powdered variety for this recipe: liquid pectin sets quickly, so measure and open the pouch before you start.
- Apple Cider or Apple Juice (1/2 cup): Cider gives a rounder flavor, but juice works in a pinch—either moistens and heightens the fruit.
- Water (1/4 cup): Just enough to get things simmering gently at the start.
Instructions
- Start the Apples:
- Combine the chopped apples, lemon juice, apple cider, and water in a large, heavy-bottomed pot. As the mixture heats, the steam will turn sweet and sharp; stir occasionally and don’t worry if the apples look a little watery—they’ll soften in about 10 minutes.
- Smash and Savor:
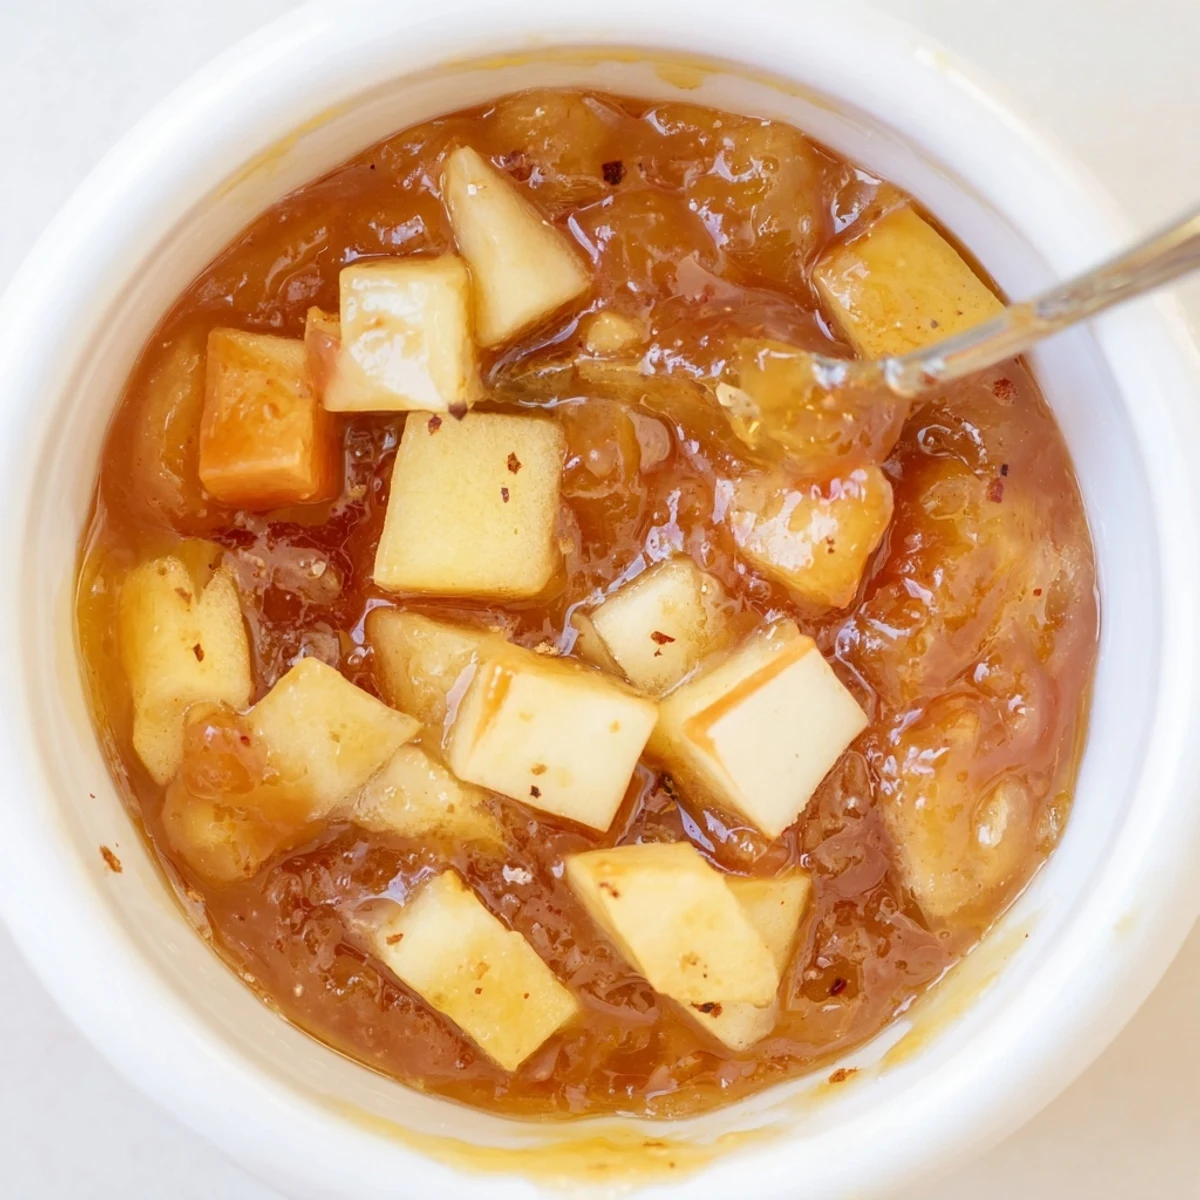
- Once the apples are tender, use a potato masher or immersion blender to partly break them down, leaving just enough texture for little bites of fruit in every spoonful.
- Caramel Mix-In:
- Stir in the granulated sugar, brown sugar, cinnamon, nutmeg, allspice, and salt until everything dissolves. The mixture darkens slightly and you might hear little fizzing bubbles as sugar meets juice—keep mixing gently.
- Melt the Butter:
- Add the butter cubes and let them melt, stirring often, over medium heat. Watch for the moment when the whole pot begins to smell satisfyingly of caramel; keep scraping the bottom to make sure nothing scorches.
- Thicken and Color:
- Continue cooking for 20–25 minutes, stirring and watching as the jam thickens and turns golden-brown. It should sheet off the back of your spoon when you lift it—and make the kitchen feel like baking day.
- Jelly Magic:
- Bring the bubbling mixture to a hard boil, then add the liquid pectin and stir briskly. Let it boil fierce for a minute or two, then remove from heat; the texture should look more jammy now, not watery.
- Jar and Seal:
- Skim any foam if needed, then ladle the hot jam into sterilized jars, leaving a quarter inch at the top. Wipe the rims, pop on your lids, and process in a boiling water bath for 10 minutes—listen for that contented pop as each jar seals while cooling.
- Store and Enjoy:
- Let jars cool completely before moving them, and store in a cool spot away from sunlight. Once opened, stash your jam in the fridge and enjoy within a few weeks.
 Save
Save One quiet November morning, a good friend texted mid-canning to say her day felt heavy. I dropped off a still-warm jar on her porch, and she later said that the golden sweetness turned her whole breakfast around. It’s amazing how a humble preserve can lift a mood and connect two kitchens at once.
What Makes This Jam Perfect for Gifting
Each time I wrap up a little jar and tie on a handwritten tag, I think about how the glossiness of caramel and the aroma of spiced apples surprise people. Homemade preserves are a gift that hints at old-time kitchen magic and a personal touch you can’t get from a store. When the holidays roll around and shelves are stocked, these jars vanish fastest from my gift baskets.
Tweaks and Swaps That Work
If I’m low on apples, I’ve learned that pears lend a subtle floral note and blend smoothly into the jam. Sometimes, I cook the sugars separately to a barely-amber caramel before stirring into the apples for even deeper color and richness. For a playful twist, I once added a pinch of cardamom—unexpected and lovely with the standard cinnamon spice.
Enjoying Every Last Spoonful
This jam’s not just for toast: swirl it through your morning oatmeal, spoon over vanilla ice cream, or tuck between cake layers for an autumn dessert. I even dollop it onto yogurt for a weekday treat, or use it to fill thumbprint cookies during winter baking binges. Honestly, there’s not much it doesn’t cheer up.
- Run a knife along the inside of the jar to release trapped air before sealing.
- Store opened jam in the fridge and use within four weeks.
- The jam thickens even more after cooling, so don’t panic if it looks runny in the pot.
 Save
Save Sometimes the best kitchen moments come with a spoonful of something warm and golden on a gray day. Let this jam bring that simple comfort to your own table or someone else's.
Recipe FAQs
- → Which apples work best?
-
Firm, crisp apples like Honeycrisp or Granny Smith yield the best texture. Mixing a sweet variety with a tart one balances natural sugars and acidity for a brighter finish.
- → How can I deepen the caramel flavor?
-
Cook the sugars until they reach a light amber color before adding to the fruit, or allow the sugar and butter to brown gently with the apples until the mixture turns a rich golden hue. Stir constantly to avoid scorching.
- → How do I get a chunky versus smooth texture?
-
For chunks, mash lightly with a potato masher and stop while small pieces remain. For a smoother spread, use an immersion blender or pulse briefly until you reach the desired consistency; longer cooking will also break down pieces.
- → What ensures a good set without graininess?
-
Use the specified amount of liquid pectin and follow the short, hard boil after adding it. Ensure sugars are fully dissolved before boiling and maintain steady heat to prevent crystal formation; lemon juice helps the pectin set reliably.
- → How should jars be processed and stored?
-
Ladle hot jam into sterilized half-pint jars leaving 1/4-inch headspace, seal and process in a boiling water bath for 10 minutes (adjust for altitude). Store in a cool, dark place; refrigerate after opening.
- → Any useful substitutions or serving ideas?
-
Try swapping some apples for pears for a softer, floral note. Use the caramel apple spread on toast, stirred into oatmeal or yogurt, as a pastry filling, or bundled in gift jars for fall presents.