 Save
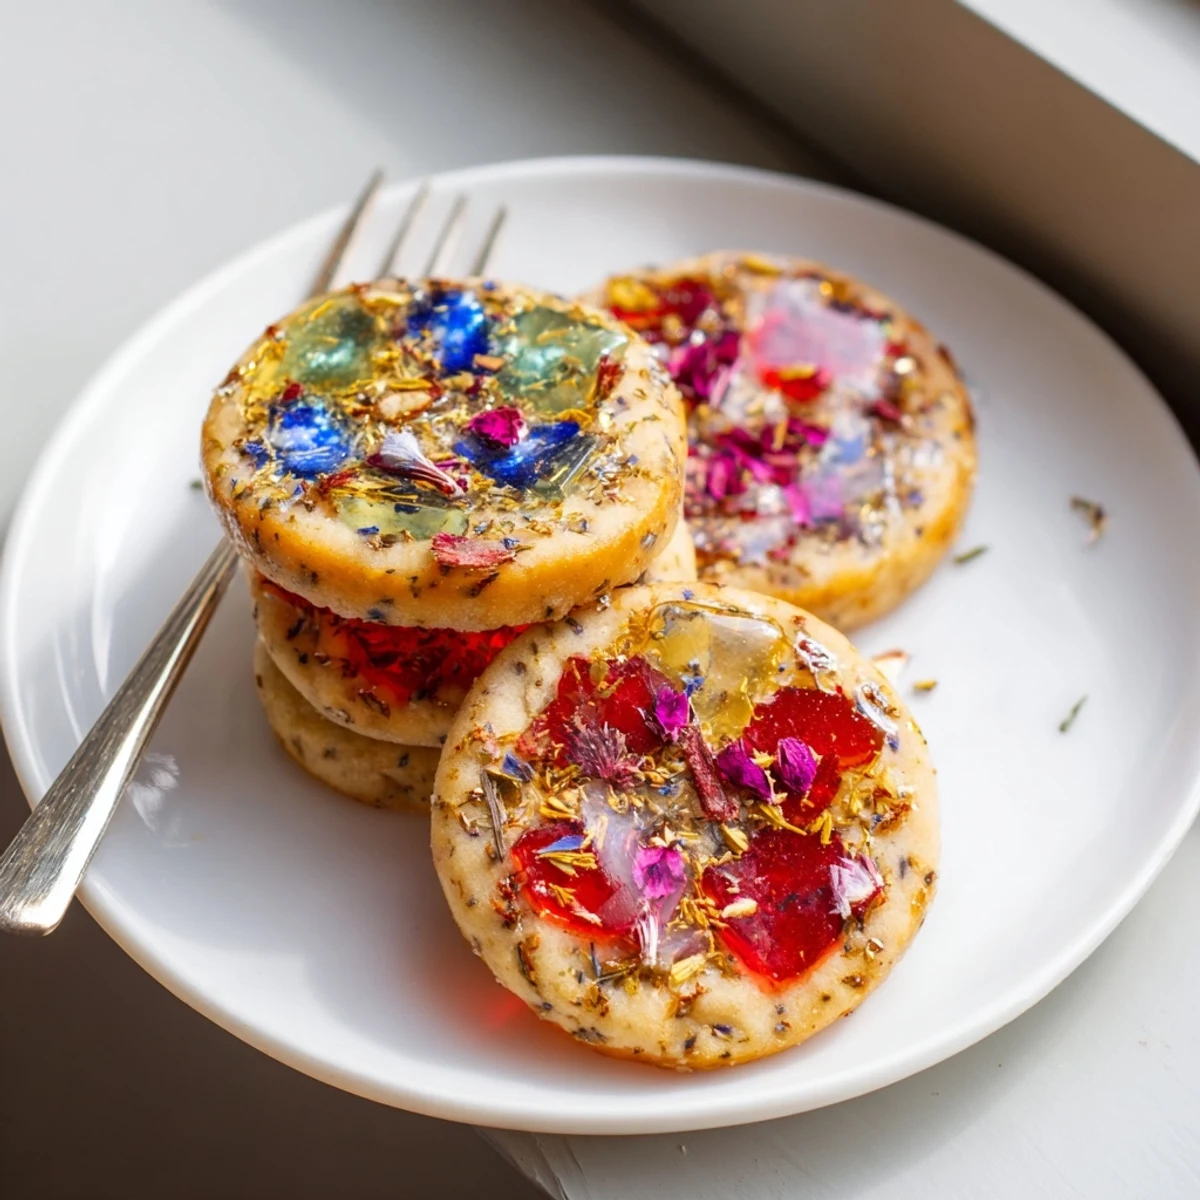
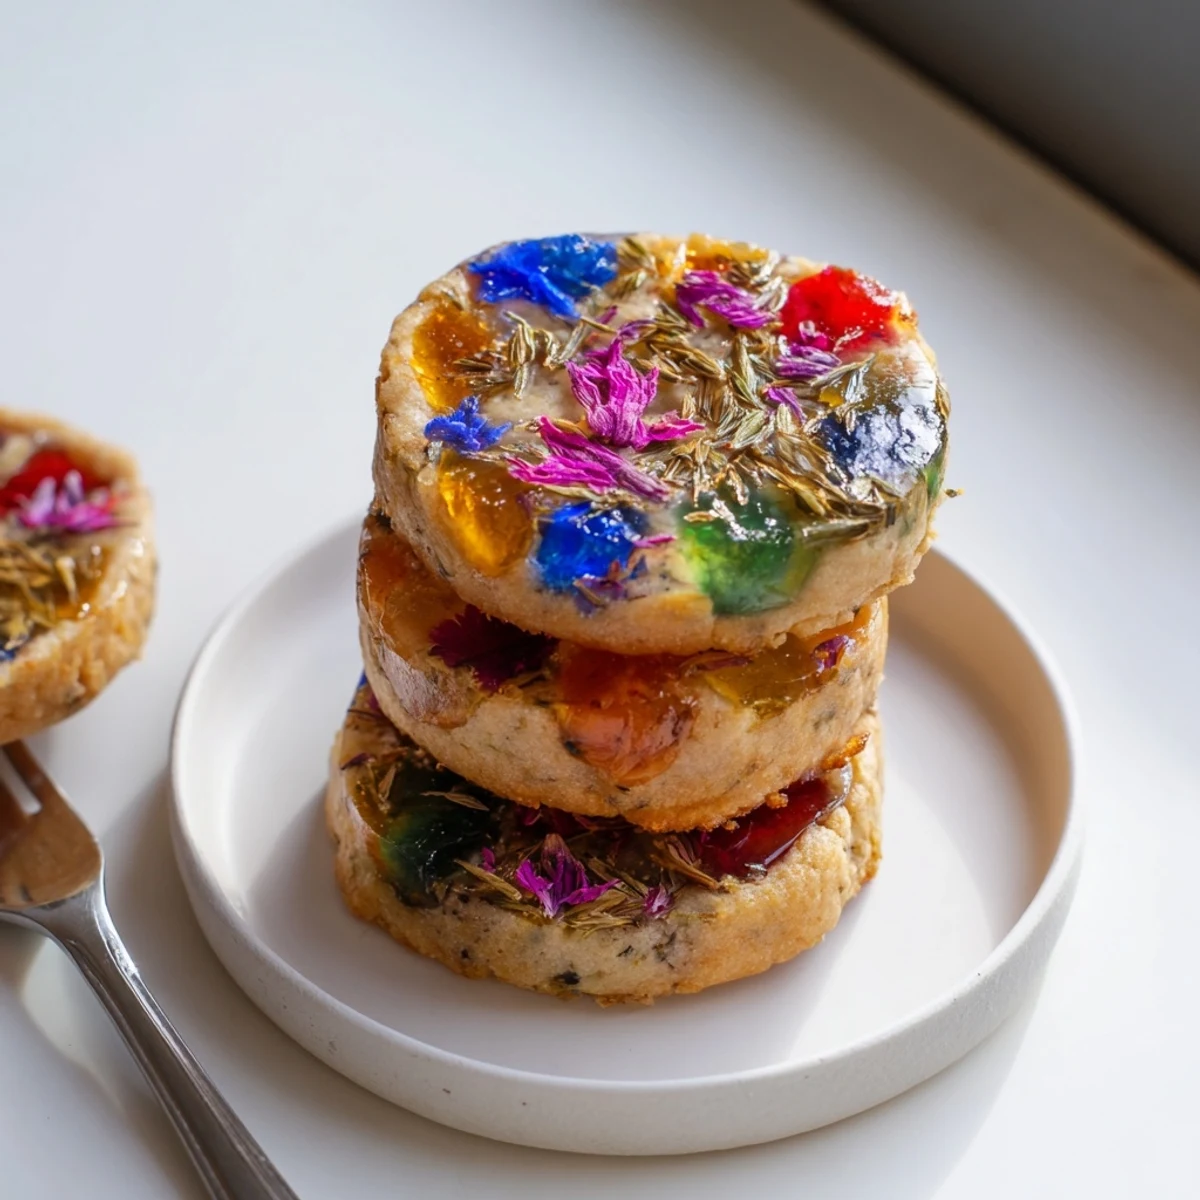
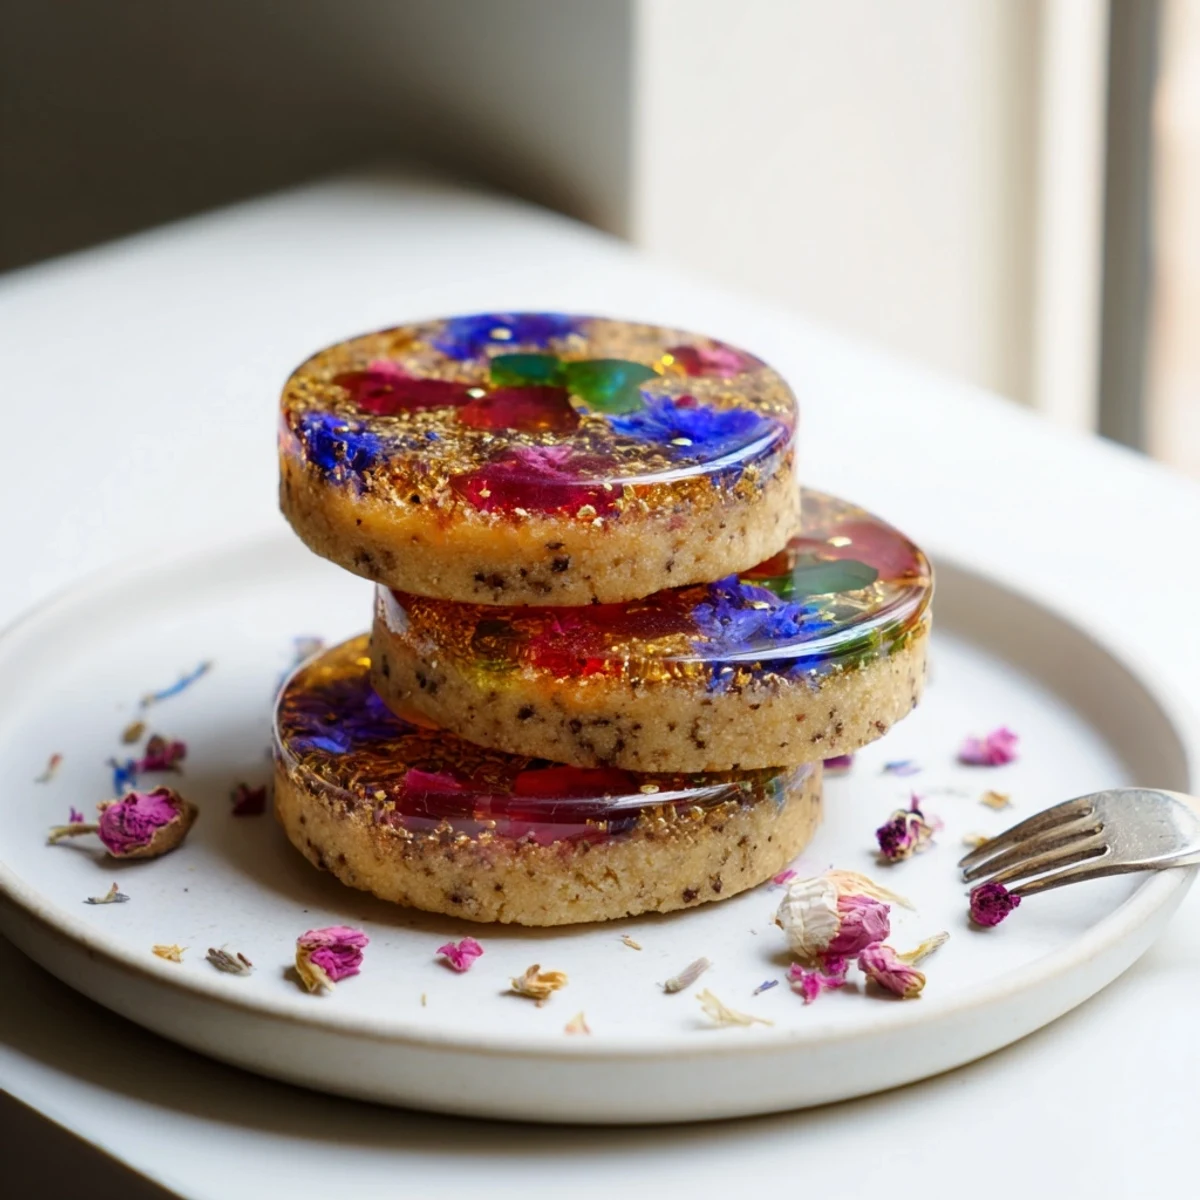
Save Create these stunning Earl Grey-infused treats that combine delicate tea flavor with a beautiful stained glass effect. The cookie dough features ground Earl Grey tea blended into a tender gluten-free base, while crushed vegan hard candies melt during baking to create translucent jewel-like centers. Edible flowers like rose petals, cornflowers, and violets are pressed into the molten candy for an enchanting floral touch.
The process involves rolling out the spiced dough, cutting windows with cookie cutters, and filling the centers with candy pieces. As they bake, the candies liquefy and then harden into crystal-clear panes that catch the light beautifully. These elegant cookies are naturally vegan and gluten-free, making them perfect for afternoon tea service, garden parties, or as thoughtful homemade gifts.
I stumbled onto stained glass cookies completely by accident when I was trying to use up a bag of hard candies from a forgotten party favor. The way light catches through those translucent centers still makes me catch my breath every time I pull a tray from the oven. Adding Earl Grey and edible flowers felt like the natural next step—something about the bergamot's citrusy floral notes just belongs in a cookie that looks like it belongs in a fairy tale.
My niece called them 'fairy windows' the first time she saw them cooling on the rack, and honestly, I cant think of a better name. I made them for her birthday tea party last spring, and the way the grown-ups hovered around the platter, trying to choose their favorite color combination, told me everything I needed to know about how special these are.
Ingredients
- 1 3/4 cups gluten-free all-purpose flour blend: Ive found that blends with a bit of sorghum or brown rice flour hold up best for cutout cookies that need to maintain their shape
- 1/3 cup almond flour: This adds such a lovely tenderness and subtle nuttiness that complements the Earl Grey beautifully
- 2 Earl Grey tea bags or 2 tsp loose leaf tea: Grind these to a fine powder—you want the tea fully incorporated so the flavor permeates every bite
- 1/2 tsp baking powder: Just enough to give these cookies a gentle lift without spreading too much
- 1/4 tsp fine sea salt: Essential for balancing both the dough sweetness and the candy centers
- 1/2 cup organic granulated sugar: The classic choice that lets the Earl Grey shine through
- 1/2 cup vegan butter, softened: I stick to a butter-style stick rather than tub margarine for the best texture and flavor
- 2 tbsp unsweetened plant milk: Any neutral variety works here—oat, almond, or soy are all great options
- 1 tbsp maple syrup: This adds just a hint of caramel depth that rounds out the Earl Grey beautifully
- 1 tsp pure vanilla extract: The classic supporting player that never disappoints
- 1/2 cup vegan hard candies: Crush these yourself so you control the size—larger chunks create thicker glass, while finer bits make delicate translucent panes
- Edible dried flowers: I grab a small selection from the tea aisle at my natural foods store, looking for rose petals, cornflowers, and lavender
Instructions
- Preheat and prepare your workspace:
- Set your oven to 350°F and line two baking sheets with parchment paper—having everything ready before you start will make the process feel effortless
- Prep the Earl Grey:
- Open those tea bags and grind the contents to a fine powder, or pulse your loose leaf tea in a spice grinder until its broken down enough to blend seamlessly into the flour
- Whisk your dry ingredients:
- In a medium bowl, combine the gluten-free flour blend, almond flour, ground Earl Grey, baking powder, and salt until thoroughly incorporated
- Cream the butter and sugar:
- Beat the vegan butter and sugar until theyre light and fluffy—this step is worth the extra minutes for a tender cookie texture
- Add the liquids:
- Pour in the plant milk, maple syrup, and vanilla extract, mixing until everything is smooth and well combined
- Bring the dough together:
- Gradually add the dry ingredients to the wet mixture, stirring until a soft dough forms—if its sticking to everything, pop it in the fridge for 15 minutes
- Roll and cut:
- Lightly flour your surface with gluten-free flour and roll the dough to about 1/4 inch thickness, then use a large cutter for the outer shape and a small one to create that window in the center
- Fill the windows:
- Carefully transfer cut cookies to your prepared trays, then fill each center with 1 to 2 teaspoons of crushed candy—sprinkle a few edible flowers on top and press gently so they nestle into the candy
- Bake to perfection:
- Slide them into the oven for 9 to 11 minutes, watching for edges that are just turning golden and candy centers that have completely melted into translucent pools
- Cool completely:
- Let the cookies rest on the baking tray until fully cooled—the stained glass centers need this time to harden and set before you move them
 Save
Save My friend Sarah texted me at midnight the first time she made these, absolutely giddy about how they caught the light from her refrigerator. Thats the moment I realized these arent just cookies—theyre little edible moments of wonder.
Creating the Perfect Glass Effect
The size of your crushed candy pieces dramatically affects the final look. I keep some pieces about pea-sized for substantial glass centers, and crush others almost to powder for that delicate, imperfectly perfect antique stained glass appearance. Mixing colors in the same window creates the most beautiful variations.
Working with Edible Flowers
I learned the hard way that flowers labeled safe for tea arent always ideal for baking. Look for flowers specifically sold for culinary use, and handle them as little as possible—those petals are surprisingly delicate and will brown if they bake too long or touch the hot metal directly.
Storage and Serving Suggestions
These cookies actually improve after a day as the Earl Grey flavor deepens and settles into the dough. Store them in a single layer between parchment paper in an airtight container, and theyll keep beautifully for up to four days. The stained glass centers will stay clear and bright as long as they arent exposed to moisture.
- Layer them face-down in your storage container so the glass centers dont touch anything that might scratch or cloud them
- If you are planning to gift these, pack them in a shallow box rather than deep containers to minimize movement
- Bring them to room temperature for about 15 minutes before serving—the candy centers are at their most brilliant when they are not too cold
 Save
Save There is something deeply satisfying about creating food that also feels like art, especially when that art tastes as good as it looks. These cookies have a way of making ordinary afternoons feel a little more magical.
Recipe FAQs
- → What creates the stained glass effect?
-
Crushed vegan hard candies melt during baking to form translucent, jewel-like centers that harden as they cool, creating beautiful stained glass windows in each cookie.
- → Can I use different candy colors?
-
Absolutely! Any vegan hard candies work wonderfully—mix colors like ruby red, emerald green, amber yellow, and sapphire blue for a vibrant multicolored effect.
- → Where can I find edible flowers?
-
Look for food-grade edible flowers at specialty grocery stores, farmers markets, or online retailers. Always verify they're labeled specifically for culinary use.
- → How should I store these cookies?
-
Keep in an airtight container at room temperature for up to 4 days. Place parchment paper between layers to prevent the delicate glass centers from sticking.
- → What if I don't have Earl Grey tea?
-
Other black teas like English Breakfast or Lady Grey work well. For floral variations, try chai, lavender, or jasmine tea for different aromatic profiles.
- → Why must cookies cool completely on the tray?
-
The molten candy centers need time to fully harden and set. Moving them too early causes the glass to crack or break, so patience ensures perfect stained glass windows.